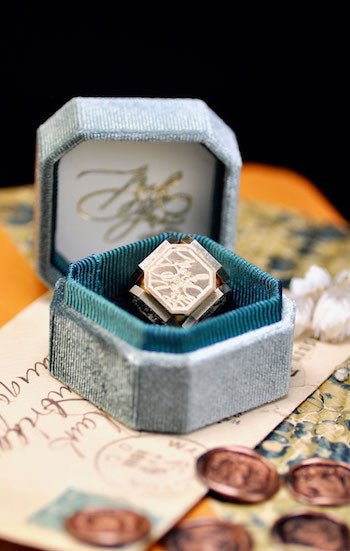
Wax seals are a beautiful intersection of ritual and tactility. To ensure your seals are as crisp and elegant as possible—while navigating the practicalities of modern life—here are 10 tips for mastering the craft:
Overheating is the most common mistake. If your wax is bubbling or too runny, it’s too hot, which can lead to thin seals and air bubbles. Aim for a consistency similar to honey. If using a spoon and candle, lift the spoon away from the flame occasionally to let the wax "rest."
If you are making multiple seals in one sitting, your metal stamp will get hot, causing the wax to stick or take forever to set. Keep your stamp on an ice pack or a cold damp cloth between presses. Dry it quickly before stamping; a cold stamp creates a crisp, clean impression and pulls away effortlessly.
For the best results, pour your wax onto a silicone mat or a piece of marble/glass. This allows you to peel the seals off once they are cool. You can then use high-bond double-sided adhesive circles to attach them to your project later, ensuring every seal on your final piece is "perfect."

Aim to pour the wax into a circle slightly smaller than the diameter of your stamp. Pour slowly into one central spot rather than moving the spoon around; the weight of the stamp will naturally push the wax outward to create that iconic organic "lip."
Wait about 5–10 seconds after pouring before you place the stamp. This allows the edges to thicken slightly. When you do press, let the weight of the metal stamp do the work—don't push too hard, or you’ll squeeze the wax too thin.
To keep your workspace clean and your hands free, use a wax seal spoon holder. This ensures a consistent distance from the flame and prevents soot from building up on the bottom of your spoon.

If using traditional wick-wax or a candle, soot can sometimes streak your colors. Periodically wipe the bottom of your melting spoon with a thick paper towel (be careful, it’s hot!) to prevent black carbon from transferring into your pour.

To make the intricate design of your seal "pop," you can use a metallic highlight pen or metallic highlight powder:
The Pen: Lightly graze the raised parts of the cooled seal with the side of a metallic ink pen. This creates a sharp, high-contrast look.
The Powder: Using a small blending brush or even your fingertip, buff a tiny amount of metallic pigment or "gold luster" onto the seal. This creates a sophisticated, diffused shimmer that settles into the textures beautifully.

Modern postal sorting machines can be brutal on traditional wax, which is often brittle. If you are mailing your seals, use flexible mailable wax (which has a plastic-like supplement) rather than traditional resin-based wax. For extra safety, place the sealed envelope inside a larger "outer" envelope.
The charm of a wax seal lies in its intentional imperfection. Don't worry if a seal isn't a perfect circle or if the edges are slightly uneven. These variations prove the seal was made by hand, reflecting a moment of focused, pure creativity.
Don’t feel limited to one color at a time. Drop two or three different colored wax beads into your spoon at once. Do not stir them completely; as they melt, the colors will swirl. When you pour, you’ll get a beautiful marbled effect that makes every seal unique.

For a touch of nature, place a small pressed flower, a piece of gold leaf, or a sprig of dried lavender onto the warm wax just before you press the stamp. This "traps" the botanical element inside the seal, adding layers of texture and meaning.
If you find air bubbles forming or the wax is melting unevenly, use a wooden toothpick to gently stir the wax in the spoon. This ensures a consistent temperature throughout the pour and helps pop any surface bubbles for a smoother finish.
If you are using wax sticks with a built-in wick, hold the stick at a 90-degree angle rather than straight down. This prevents the flame from burning the wax (which creates black soot) and allows the wax to melt more cleanly onto the paper.
To engage more senses, you can add a single drop of essential oil to the melting wax in your spoon. As the recipient opens the letter, they’ll be greeted by a subtle fragrance—like cedarwood or rose—that complements your aesthetic.
If you make a seal directly on an envelope and it goes wrong, don’t panic. Let it cool completely, then use a craft knife to gently lift the edge and peel it off. If the paper is sturdy, you can often remove it without a trace and try again.
The oil and heat in wax can sometimes "bleed" through thin, porous paper. When sealing mail, opt for high-grammage paper or envelopes with a smooth finish. This prevents the wax from soaking in and ensures it sits proudly on the surface.
If you want a thicker, more "substantial" look, do a double-pour. Pour a small base of wax, let it set for three seconds, and then pour the remainder in the center before stamping. This creates a tiered, high-relief effect.
To keep your colors "pure," wipe your melting spoon with a paper towel while it is still warm whenever you switch palettes. This prevents a dark blue residue from muddying a pale misty blue or white wax.
For invitations or special gifts, lay a piece of silk ribbon or twine across the envelope flap first, then pour the wax directly over the center of the thread. This "locks" the ribbon in place, turning the seal into a functional and beautiful fastener.